Thursday, October 31, 2013

Mixed Media Wall Plaque

Shannon is the owner of Bombshell Stamps and she's one of the coolest, kindest, most generous ladies I've ever had the pleasure of working with. Her tremendous talent brings out the best in everyone around her.

 Today we're celebrating Shannon's Birthday with a surprise blog hop. 

Instead of a birthday card I made a wall plaque featuring her gorgeous stamp, Madonna Woodcut . It's one of my all-time favorites.


For the background I took an old calendar page (nice and thick, great for crafting and it keeps it out of the trash bin while saving you money) and embellished it with acrylic paint, spray paint and splatters. 

The image is stamped with Memento black ink and colored with Copic markers. After coloring, I fussy-cut it out and finished the edges with black marker. The collage is mounted on a plaque I found for 75% off at Michaels in their home decor department. I always collect interesting bases when I see them at a reasonable price as I know they'll be fun to collage on top of.

To see the rest of the hop just follow the list below. 


Kas 
Milo 

Again, Happy Birthday, Shannon!
May the year ahead be filled with good health, laughter and success.

Warmly,
~~~Nicole

Recycled Playing Card Postcards - Give Away


click all the pictures in this post to see them larger
Thanks so much for the warm response to my altered playing card tutorial. It's so nice to hear from so many of you who are excited about this project.

I decided to tackle another batch of cards this afternoon, this time focusing on the etched hearts. First I typed up some of my favorite quotes from Pinterest using my all time best and most used font you see on every single project I do (just about). It's naughtily named, "Fucked Olympia" which completely confused me. Was the first word in that phrase "I" or "He" or "Nobody"? Turns out soon after I downloaded it, I was looking at vintage typewriters and the brand was Olympia. *lightbulb moment* So it's the olympia font, just a little bit messed up. 

Okay, now where was I? Right, made another batch...

After printing the quotes out on our laser printer (ink jet runs when you use Mod Podge) I mixed and matched quotes and hearts, let them dry and then added in details with a black pen. The etched gesso is a perfect gutter to guide your pen lines. Easy peasy.

Since last year I've had a set of Pantone Postcards lying around my craft room. I'd bought them with the lofty goal of making cool collages on them and mailing them to friendlies far and near. Yeah, that didn't happen. I kept saving them for the perfect project - which, of course, never came along.

Today they were called into duty. 


And now for the giveaway, leave a comment telling me which card is your favorite and I'll choose someone to send one to. Make sure there is some way I can contact you :-)


Thanks for stopping by.
Warmly,
~~~~Nicole


Wednesday, October 30, 2013

Recycled Playing Cards - Mixed Media

click all pictures to see them better
Our family has been playing a game called SPLIT for at least eight years and we recently ran out of score sheets and the cards were Cheeto-stained, bent and in pretty bad shape (like me some days). So we grudgingly opened a new box (I had bought a couple when the company folded) but no one could bear the thought of throwing away the old cards. This project is born from happy memories meets uncharachteristic sentiment (we're usually pretty cold-hearted about stuff).

I prepared the cards with a thick layer of gesso applied with a palette knife. You waste a lot less this way than if you use a brush and spreading is quick and as easy as buttering bread.


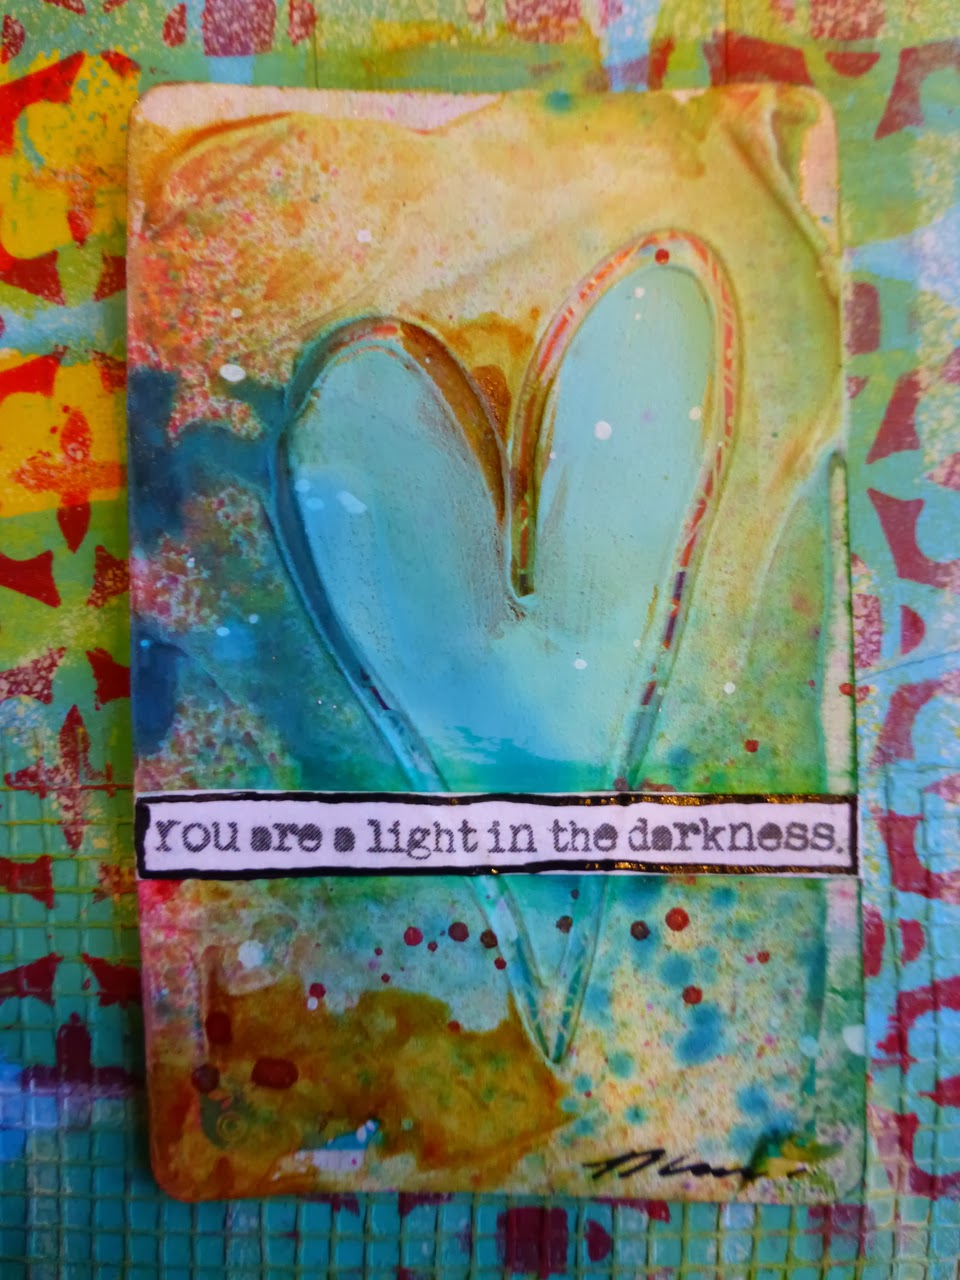
This is a great time for mark-making so etch into some of the gesso. I mostly made hearts as they're easy. You can make marks with the back of a paintbrush, a skewer, pencil, stick - whatever. 


Drying time. *sigh* The bane of my existence and I've gotten weird about preferring natural air drying over using my heat gun. Why? It seems more stable to me. And I'm a nut.

Anyhow...

 Since I wanted to maximize what was accomplished during my (eternal) dry time I spritzed them with spray ink. This is a very unintentional step. Don't stress it. Some will look good, some will pool and muddle and look bad. It's all fine. Once it dries gesso and ink combine and the results are rarely recognizable from what you see at this stage. 


Then, just for shits and giggles I splash around some alcohol ink. Love this stuff. Never used it as intended. I just splash, splash, splash the stuff all over my projects and then grin at it like the Cheshire Cat. It's good stuff. Covers everything. Spreads like a zombie virus. Win all around.


Here's one batch of cards. I did one craft mat (official distance measure in my house) worth of cards at a time. Waited an hour or three until they were safe to move off onto the table (Still very sticky, but moveable) and then made another set. It took all day but all 104 are now prepared.


I sorted them according to the ones that were awesome and the ones that sucked. I'd dress it up but that would be dishonest. Me: 

Suck. Suck. 
Really, Nicole? Suck!!! 
Awesome. Everyone come see this, it's so cool! 
Suck. Suck. Good. 
Like it. Like it. Like it. Um, no. 

Then in my traditional backwards way of doing things, I started with the ones I hated so if I wrecked them, they were already destined for the trash and it would fall under the 'no harm no foul' rule. 

They were ugly. As you can see in the pic above (left side), my gold alcohol ink (just found it in a box) made brown splotches. Not even brown really, more like puce. Ick. 

So I added some ink, spread some large mica flakes and did my best to salvage them.

Now I luuurve them. So pretty and fun. No Cheeto stains.

Here's the first dozen or so:


Thanks so much for visiting!


If you'd like a print out of the quotes I used on these cards please click this download link.
Special thanks to Carla Devine for creating this document.

Friday, October 25, 2013

Papertrey October Blog Hop Challenge


Papertrey Ink is having a blog hop! The challenge is to make a set of five Christmas tags :
Before you know it, all of the gift giving that goes hand-in-hand with the upcoming holidays will be here.  This month we thought we would challenge you to get a head start and create a quick set of five gift tags.  They can be as simple or as complex as you wish, but be sure to make at least five! 
Here are mine, I made them using PTI card stock that I cut with my half and half die collection.

click to see this full-sized

I ran them through my Cuttlebug with a striped embossing folder (sorry, can't recall the name of it) and stamped the top detail in Pure Poppy using the coordinating  Half and Half stamp.


Across the bottom I added some polka dot washi tape and a little row of jewels. I've had these Heidi Swapp jewel strips for eight years and they were still sticky. Color me impressed!


For the sentiment, I die cut and stamped the flourish from Boutique Borders: Thanks Mini Stamp set and then added the phrases from that set and from the Winter Hills set.
To finish things off, I added a shabby fabric flower and polka dot ribbon which I affixed with my tiny attacher. 
These will sure come in handy in the months to come. 
Thanks so much for stopping by.
Warmly,
~~~Nicole


Monday, October 21, 2013

House + Love = Home Mixed Media Collage


I thought it would be fun this time to take my monochromatic teal background and add a red foreground for impact. 


For the houses I used Gelli prints - it adds so much interest when you use hand-printed paper.